Showing posts with label dress. Show all posts

Friday, 29 May 2015

Simplicity New Look Competition


Hi everyone! Long time no see! I haven't had much time for sewing lately as I've been concentrating on getting myself fit and healthy, but I saw this competition mentioned in the latest Love Sewing magazine and just knew I had to enter! Unfortunately I only saw it on the 19th of May, and the competition ends on the 31st so I knew I had to get my tail in gear to get it done!


There were three categories for the competition - Dressmaking, Vintage, and Newcomer. Each category had a different pattern, and as I picked the Dressmaker challenge, I received a New Look 6145 shift dress pattern on the 24th May and got to work straight away!


I had some gorgeous ticking fabric in my stash that my lovely friend Emma gave me, and I knew it would be perfect! 
I decided to play with the pattern a little, so I chose to make view E without the collar, and thought it would be fun to quarter the front of the pattern, cut the ticking on the bias, and make a diamond shape pattern! (I know, with 5 days to get it done and the small one on half term holidays from school - I *might* be a little crazy!)
So I traced, and cut, and pinned like crazy...and this was the front - I breathed a HUGE sigh of relief, I can tell you ha ha!


On the back I decided to quarter the pattern to continue the waistline round, but I didn't do the same pattern with the fabric, deciding instead to just chevron it down the centre back. 
Now came the easy part - sewing it together!
I'm really pleased with how it turned out, especially as it was such a fast turnaround, and my first attempt at pattern matching stripes! Eek!


I think I'll be making quite a few more of these, although perhaps next time I'll just use a plain fabric! Ha ha!
I'm just glad I managed to get it finished today in time to enter it!

Thanks for looking
Lisa x

Tuesday, 3 June 2014

Of a magazine, a pattern, and a dress. . .


A few weeks ago I saw a new magazine that was being launched called Love Sewing, and it looked good so I decided to give it a try - it's fantastic! Lots of projects, new fabric lines, interviews, helpful articles, free gifts and patterns...what's not to love? I'm now subscribed so I don't miss an issue! 
The free pattern in this issue was a downloadable one from Simple Sew Patterns - the Brigitte dress.
I thought it was really pretty, and fairly simple which is good as I don't often make things for myself!
They suggest in the magazine to use cotton or jersey, so I decided on cotton as I already had a couple of metres of this gorgeous Makower beach huts fabric from Ditto Fabrics and thought it would make a pretty summer dress.
Printing out and assembling the pattern was pretty straightforward - after measuring myself and checking the sizes on the pattern I made a size 16 (I wear a 12-14 in 'shop bought' clothing) so make sure you check your sizes...however this is quite the norm for sewing patterns!
I also decided to make the sleeves shorter, and to add a lining as the cotton I chose was a little see through!
I'd never made a lined dress before, so I chose a thin cotton (from an old bed sheet!), cut all the pieces as I did for the actual dress, and tacked the pieces together like for like - from then on I treated each piece of matching tacked lining and dress fabric as one piece, and then sewed it all together. It worked really well doing it that way!
This is a 'halfway stage' picture...
The step-by-step instructions were really clear and simple to follow...even for the invisible zip, which I'd never done before! Mine didn't turn out QUITE as invisible as I would have liked, but that was down to my sewing skills and not the instructions lol! 
Overall, I was very impressed - I will definitely be getting more patterns from them! Actually, Issue 2 of Love Sewing arrived on my doormat yesterday (3 days before it's available in the shops - the benefits of subscribing!) and it has a paper pattern for this beautiful top and skirt from Simple Sew Patterns as a free gift, so I will be blogging those makes shortly! I love the vintage styling of them and can't wait to get sewing! 

So anyway - here's a pic of the *almost* finished dress...I hadn't hemmed it here lol!

And one of me wearing it (over jeans, it was chilly lol!) - excuse the photo, I had to rope in the Mr. to take it!
 I've worn it a few times since and had lots of nice comments - people even asking me where I bought it! Nothing better for a sewer than to hear that!
Well, I say nothing better...
I opened the above Issue 2 of Love Sewing yesterday, and what should I see but MY DRESS! In the magazine! I was over the moon!
Although next time I take a picture of something I make and post in on Facebook, I'll make sure to not have my ratty old ironing board in the background ha ha! Oops! 

In the next couple of days I will be sharing some thoughts on my new sewing machine with you too, now it's had a good road test!

Thanks for looking
Lisa
xxx

Thursday, 1 September 2011

Superman, Custom Feliz, and a sneaky peek!

Hi all!
Thought I'd show you my latest creations....
Russ had this tshirt for ages, and loved it, but it got a little tight for him lol! So I rescued it from the trash, and turned it into a shirt for Jamie.
Jamie decided he needed to do some of his 'posing' shots.....

Then I made this Feliz today...it's a little different to the usual style I make. It has no overdress, no frills, but it does have the sash ties still, with grosgrain ribbon straps and a giant applique flower. I love the way this turned out!

and finally....a sneaky peek at the oilcloth camera bag I'm working on...it's going ok so far lol!

Thanks for looking!
Lisa
xxx

Thursday, 25 August 2011

A catch up . . .

With everything that's been going on, I haven't really felt much like posting here....so I suppose I should catch up on everything I've made since the last time I posted. (Don't worry, there's not tonnes...I haven't felt much like sewing, either!)

Firstly, a Feliz dress I sewed for my friend's little girl to wear to a wedding...

Then yesterday I made some self-drafted camera strap covers...these are all for sale on my Stuff Mummy Makes Facebook Page...


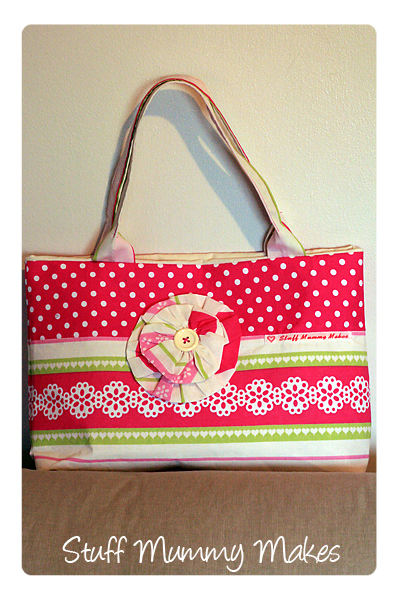
and finally, a self drafted oilcloth shopper that I made today! I'm seriously in love with this bag....and as it looks like I've sold this one already, I might just have to make another one for myself lol! 


This was my first time working with oilcloth, and I love it! It was also my first time making an elasticated pocket, so yay!

And that's it! (See, I told you it wasn't loads lol!)

Thanks for looking

Lisa
xxx

Monday, 27 June 2011

Farbenmix Feliz Dress!

Well the thermometer has been in the low 90's for most of the day here today, and what have I been doing? 
That's right, boys and girls...I've been sewing a Feliz!
I started about 9.30am this morning, and finished it around 5.30pm this evening - I didn't even stop for lunch lol! (Ok, so I stopped and made Jamie some.....)

I'm so pleased with it, especially considering it's my first one and I don't generally 'do' patterns - I just hope the little lady I made it for likes it too! (I know her Mum does ha ha). The more I look at it, the more I think it has a touch of Alice in Wonderland about it lol!

So anyway...pics...

Front
Back
Close up of the ruffly bits!
Thanks for looking - lets hope it's a bit cooler tomorrow!
Lisa
xxx

Friday, 27 May 2011

Long time no see lol!

Sorry I've been MIA for a little while - I've had a project or 6 that I've been working on, but had to keep a secret until now as the people they were a surprise for have my blog addy lol! So now they all have them - I can show you!
Some of you will know my Dad's been in hospital...and his nurses did such a good job that he wanted to give them a thank you gift! So he asked me to make each of them a bag, as some of them had seen the one I made my Mum for Mother's Day and said they liked it!
And here they are - all six of them lol! 


By all accounts they were very pleased with them, so yay! I'm glad I was able to do something nice for them after the great way they looked after my Dad!

Also, remember my post with the photoshopped Farbenmix Vida dress? Well, I finally got it made! Yay me! 
Here it is.....I'm so happy with it - I think it's the most ambitious single item I've made since I started sewing!

The back of the dress....
 and the front! 
I think I'm going to have a weekend off now lol! 

Thanks for looking, hope you have a great long weekend! 

xxx

Sunday, 15 May 2011

Using Photoshop to plan fabric choices!

This was kind of a lightbulb moment for me this afternoon.....so I thought I'd share! Those of you who sew and have Photoshop have probably been doing this for years, but I've only just caught on (I'm not the sharpest tool in the shed, if you hadn't already guessed! Ha ha!).
In the post below you'll see I bought a Farbenmix Vida pattern, and I was trying to plan in my head what fabrics I had and what to put where, when I suddenly had a brainwave - why not Photoshop it?

So I took photos of the fabrics, and a photo of the line drawing on the front of the pattern, et voila! Instant (relatively!) dress right there on the screen!


I think I'll be doing this now for all my patterns!

Thanks for looking!

Lisa xxx

Saturday, 14 May 2011

Yay! New Pattern Goodness!

My Farbenmix Vida pattern arrived from Dots n Stripes today! Super fast delivery, too! I'm so excited - I can't wait to get sewing this beautiful dress.

You'll see just on the right there the little label that came with it to sew onto the dress - I didn't know you got that too, so that was a lovely surprise! Here's a bigger picture of it...

Cute, huh? 

And finally, this made my day - on my delivery note from Dots n Stripes ....

It's the little personal touches that make all the difference, isn't it? I'll definitely be buying from them again!

Besides this, I have a tonne of other sewing to do too over the next few days - but hey, it's better to be busy, right? lol!

Hope you have a great weekend everyone, and thanks for looking!
Lisa
xxx

Friday, 6 May 2011

I've been a busy girl!

Over the past couple of days, so I thought I should share with you what I've been making!

Firstly was a couple of bags (yeah, like you're shocked......lol!) - I think these have a very fresh and spring like feel to them!

Fabric used: Kate Spain Central Park North Meadow Aqua
Free Spirit Designer Beads Mist
Free Spirit Designer Solids Aqua
15mm Plain Ribbon Plum

Fabrics used:  Carolyn Gavin Spring Street Buzzing Gardens Multi
Carolyn Gavin Spring Street Tossed Flowers White
Free Spirit Designer Solids Lemon
15mm Plain Ribbon Blue

 All the above fabrics and ribbons were bought from Sew Me Happy - my favourite UK fabric shop! (And I'm not getting any payment or goods for this mention - I just love them!)

And then something that's NOT a bag - another dress! This one is for a friend's gorgeous little 2 month old girl - I hope she likes it! Its based on the Made By Rae Itty Bitty Dress  with a few variations of my own. You'll notice this is the same fabric as my camera bag and the other little girl's dress I made - I think it suits the style perfectly!


So that's it! 

Have a great weekend, and thanks for looking!
xxx

Wednesday, 27 April 2011

Girl's Dress (no, not a bag lol!)

I decided I wanted to make something I'd never made before. So I decided to make a little girl's dress (I don't have a little girl, and my 3 year old son definitely doesn't like 'girls stuff' as he calls it lol!)

So this is what I came up with - I was very pleased with how it turned out! I just used one of Jamie's shirts as a pattern base, and went from there!

You might recognise the fabric as being the same as that from my camera bag - it looks much better in a dress! 

Thanks for looking!
xxx

Friday, 11 March 2011

Making a dress without a pattern tutorial.

This is my first tutorial for clothing....so bear with me lol! I'm going to show you how to make a dress like this, using a tshirt as a guide!


This will work for any size dress, as long as you have the right fabric - it needs to have some stretch to it, so a knit jersey type fabric would work best!! So from kiddies sizes up to adults, anyone should be able to do this! (Let's face it, if it came out of my head, it can't be too hard, right? Rofl!)
It can be long, or short...have a waist or an empire line...long or short sleeves...or no sleeves at all!

Firstly, grab a fitted(ish) tshirt that you have already that you love. Not for the pattern or design. For the fit, because we're going to be drawing around bits of it to make your dress.
Here's mine...excuse the creases, it's been screwed up on the table overnight!


Next, put it on. Mark with a pin or chalk where the waist will be (I'm making mine empire line, so it's just under my lumpy bits lol - you can do it at the waist if you like!).

Take your shirt off, fold it in half lengthways. Make sure you can see the mark you made on it...and please, put another shirt on. It's cold out!

 Then folding your fabric in half , place your shirt so the centre fold is against the fold of your fabric. With me so far? Good. This is actually taking longer to type than it does to actually do this lol!


With your chosen tool, draw around the outline of your tshirt, making sure to draw the arm holes and not the arms! Only draw down to the mark on your tshirt though, not all the way down!


Next, cut it out, leaving your preferred seam allowance all the way round (I use roughly 1cm - I'm not one for exact measurements if I can help it lol!). Then do exactly the same all over again, remembering to leave one neckline high and one lower for front and back.


Now comes the science bit....lol!

Open out one of the top pieces, and measure the width of the bottom seam, and include the seam allowance.


Get a pen and paper as you'll want to write these numbers down!
Divide this number by 3. (Roughly...not to the 5th decimal point or anything!). This will be the width of the top of your skirt pieces.
Then for the bottom measurement, take the first number (the width of your bottom seam of the body) and use that. For a shorter skirt, if you don't want it so full, then just double the skirt panel top measurement. Simple!
You'll need to measure and cut 6 of these panels, once you've decided on your skirt length. The easiest way is to fold your fabric lengthways, measure half the top measurement, half the bottom, them join them up and cut (leaving a seam allowance). See, I told you this was easy!


Next, sleeves. Mine are very long, (I like them like that!) but you can do them any length you like! Go wild! 
With your fabric folded down the length of the arm, trace the arm hole section from one of the top pieces of your dress onto the fabric, and then make your sleeve any shape/length you wish. I traced the arm of the long sleeve tshirt I used at the start of the process, just making it a little longer and flared at the bottom as the sleeves are too short for my liking (and I like a flared sleeve!)
Make 2 of these. Unless you're an octopus, then make 8.
For some reason, I completely forgot to take photos of this part - sorry!

OK, that's it! Now we just need to sew it together!

Sew 3 of the skirt panels together.

 then sew them to one of the top pieces.


Do the same with the other top piece and the other 3 skirt panels.

Sew the 2 pieces together up the side seams, and shoulders.


(As I'm not always fantastic with my measuring and cutting, I always leave the bottom hem til last so I can put it on and then measure the length....and in case the pieces don't exactly meet up at the bottom. It does happen.)

You should now have something that resembles a half finished dress!
You have?
FANTASTIC!!!

Now, on to the sleeves!

Sew up the seam on the underside of the arm, and then hem the cuff.  

With your dress inside out, and your sleeve right way out, slide the sleeve inside the dress with the armhole ends together.  You might need to pin this in around the arm hole to make sure it's even and in the right place - I often wing it lol! Shhhh! 
Then sew round it, and repeat for the other side.


Can you feel it? The end is in sight now....


There are so many ways you can deal with the neckline...I like to just fold mine and sew it round because I'm lazy (and I like the look it gives!) but you can add binding, tape, lace...even plait some leftover fabric and edge with that!


And then hem the skirt! It's really that simple! (See, I told you you could do it! Aren't you proud of yourself?)


Please, if you make this, stop by and show me your creations, I'd love to see them!
Thanks for reading!
xxx


Catch Up Time (Again!)

  Wow!   So much to catch up on... Not sure why, but my blog has been on my mind lately and so I popped over - I can't believe it's ...